Contents
Index
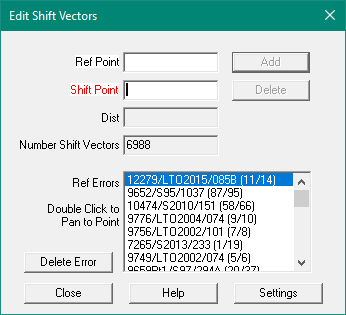
Edit Shift Vectors
You would normally use the 'Create Shift Vectors' option to create 95% ofthe vectors automatically.
This option allows the vectors to be edited, deleted or added as needed .
When the correction vectors are satisfactory, a correction file can be exported.
Delete Shift Vector
To delete a vector, click either point on the vector with the mouse.
The vector details will be displayed
Click the Delete button in the edit menu and the vector will be deleted.
Add Shift Vector
To add a vector, click a point on the Shift layer (Shift Point),
and click a point on the Reference Layer (Ref Point)
The Shift vector details will be displayed
Then press the “Add” button to add the shift vector, which will be drawn on the screen.
The Contour option will re-display the contours if turned on (see Settings).
Reference Errors
The 'Create Shift Vectors' option can create 95% of the Shift Vectors.
However it cannot handle complex shapesor differences between the parcels.
The partially matched parcels will be listed for you to manually inspect and rectify the shift vectors.
Double Click on a parcel to pan the screen to that parcel.
You can inspect it and add, edit or delete vectosr as required.
When you are finished, you can delete the parcel from the listing.
Settings
This will display the Shift Vector Settings dialog
Compute Shift Vectors
Edit Shift Vectors
Shift Vector Settings
Read Shift Vectors file
Write Shift Vectors file
Write Shift Vectors to an FME format file
Write Shift Vectors to an ESRI format file